Creating an abstraction layer for the model

Have you ever seen different layers for the model in iOS development? I never have. When using Core Data, for example, we usually manipulate NSManagedObject directly in the view. That’s not ideal. So for once, I looked at how I could create an abstraction layer for the model.
Why another model?
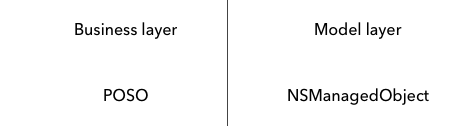
I’m using Core Data to store the data in our app Remember. To create a Core Data model, I need to inject a NSManagedObjectContext object in the NSManagedObject constructor. The problem is I don’t want to have to pass around the context object everywhere in the app. I want it to be isolated in the model layer. And I want to manipulate simple POSOs (Plain Old Swift Object) in the business layer.
To do that, I need a way to translate my NSManagedObject objects into business objects and vice versa.
Also, my database objects should not know my business objects. By doing so, I could easily replace Core Data with another database provider, without impacting the rest of the codebase. This idea is inspired by the Clean Architecture.
Business and model layers
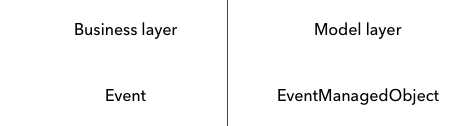
In our app Remember, I only have one table to store the last times a user did something. Pretty simple.
I created an Event class in my business layer. This is the object I will manipulate in the views.
For the model layer, I created an EventManagedObject class, which inherits from NSManagedObject.
From one model to another
To convert the objects in both directions, I created an ObjectConvertible protocol, implemented by the Event class.
The identifier is used to fetch the corresponding NSManagedObject, if there is one.
Then I created a ManagedObjectConvertible protocol.
Because I didn’t want to rewrite the same code in each NSManagedObject subclass which implements this protocol, I wrote a protocol extension where most of the job is done. This is where the magic happens.
This protocol is implemented by the EventManagedObject class.
Thanks to the protocol extension, I have only two methods left to implement. Those are the methods that transfer the business object’s data to the database object’s data and vice versa.
CRUD operations
It is now super easy to perform operations on the Event object, without manipulating NSManagedObject objects directly.
Store
At the beginning of this article, I said I didn’t want to have to pass a NSManagedObjectContext object throughout the code.
To isolate the context, I created an EventStore class, which keeps a reference on the NSManagedObjectContext object.
The store can then be used in a view controller or a view model for example.
The business layer uses the store to perform operations on the business objects. It doesn’t know where the objects are stored, it could be in Core Data, Realm or even in files. This is my abstraction layer.
Downsides
Even though this method provides some comfort when working with model objects, it has some downsides.
The biggest one is I can’t use Core Data’s built-in lazy-loading system or NSFetchedResultsController. If I wanted to use it, I would have to create my own pagination system.
Dealing with relationships is also not implemented in this solution. Even though I didn’t investigate it, the conversion of the nested objects would probably be in the from(object: T) and toObject() -> T implementation methods.
Final thoughts
I managed to do what I initially wanted, the Event class is totally agnostic of the EventManagedObject class.
I’m manipulating simple objects in the views.
And the model layer is isolated from the rest of the application. I could definitely replace Core Data with another database provider, without impacting the rest of the codebase.
The only thing left is to handle Core Data errors. Something I will definitely do in the app.
I honestly never worked on an app that had an abstraction layer for the model. As I said, it’s not common in the iOS world, from my experience at least. But I’m super happy with the result and I will definitely use it in my side project Remember.
Any feedback is welcome!
A big thank you to Ayrton for his help.